
WELCOME
The LocationsHub Guide
ADMIN
Create Your Account
Edit Account Details
Recover Your Password
Change Your Password
Change Your Email
Update Credit Card Info
Purchase a Package
Cancel Your Package
Renew Your Account
Change Your Package
Why Your Listing Isn't Live
LOCATION
Add a New Location
Delete a Location
Edit a Location
Edit Location Contact
Show or Hide Location Address
Search for Your Location
Share Your Location URL
PHOTOS
Upload Photos
Edit Photos
Rotate Photos
Sort Photos
Delete Photos >
LIGHTBOXES
What is a Lightbox?
Create a Lightbox
Sort Locations Within a Lightbox
Share a Lightbox
Managing your property listing(s) on LocationsHub is a simple process. The links on the left will walk you through the main process of listing your location. Bookmark this page for future reference in case you need a refresher.
1. Log-In to "My Locations"
Log in to your account and click on the "My Locations" tab on the left.
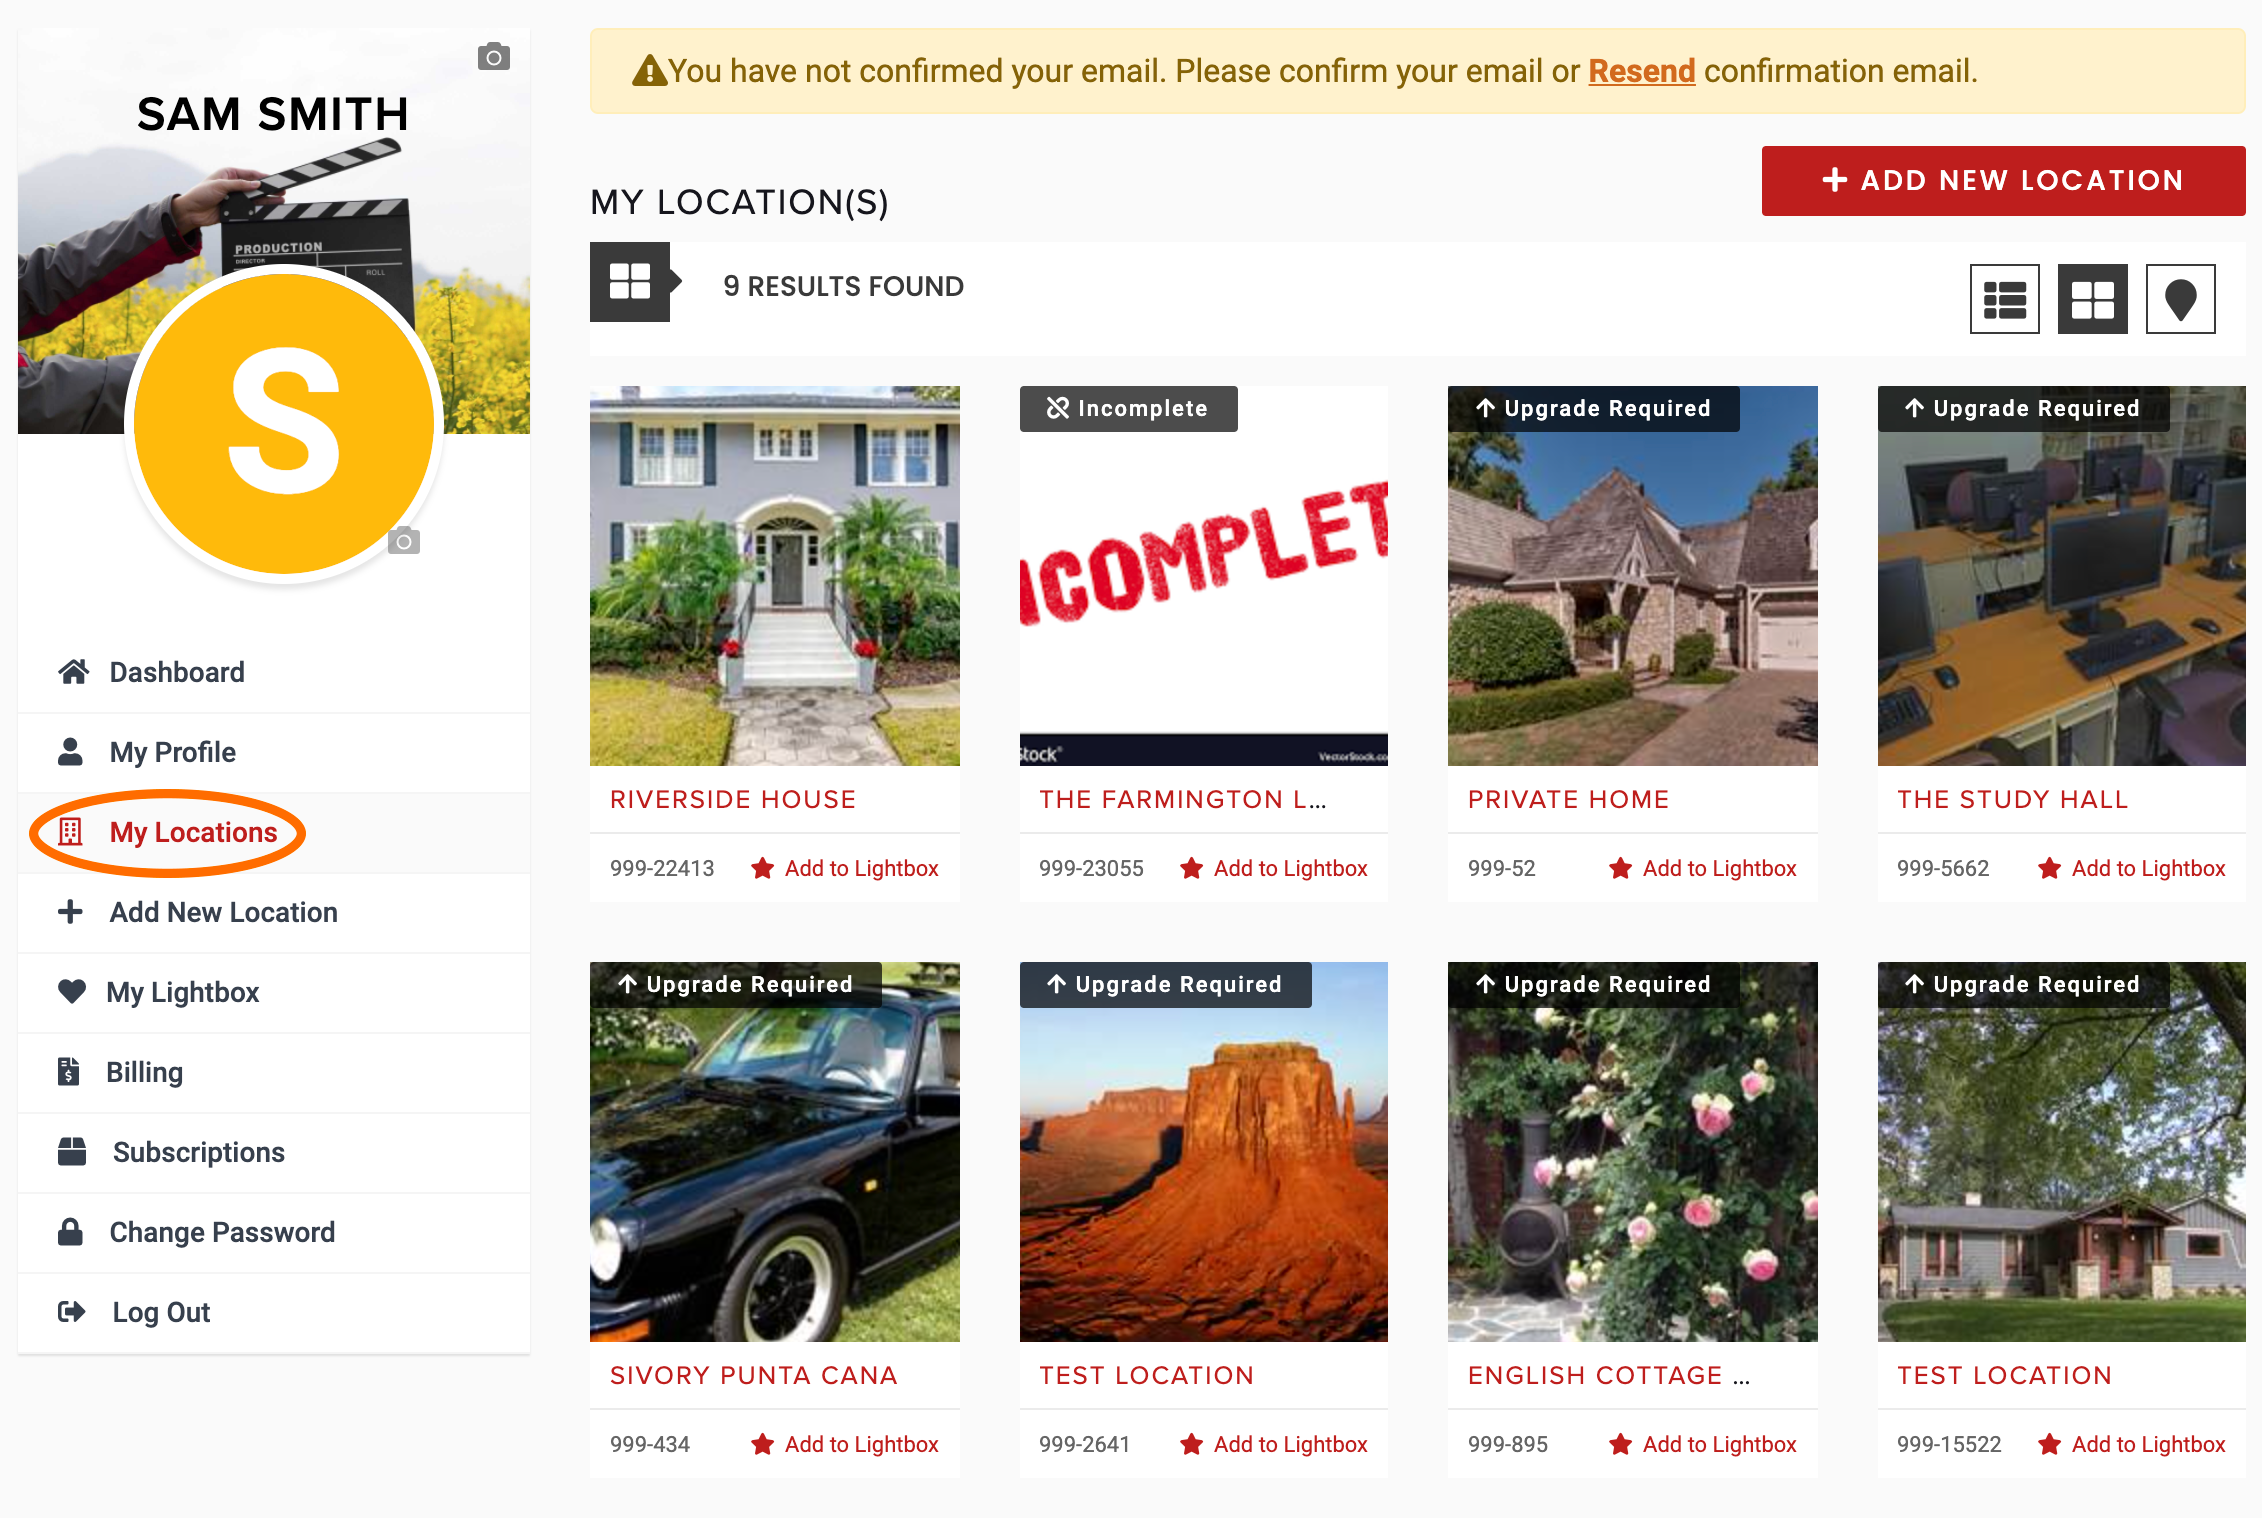
2. Choose The Location to Edit
If you only list one location, the gallery will just display that location. If you have multiple properties listed, the gallery will display thumbnails of those properties. Find the location you’d like to edit. (For example, we would like to edit “Riverside House” below.)

When you hover over the thumbnail of the location, a set of icons appears. Click on the Pencil icon to edit this location. (Note: when you hover each icon, it will turn red.)

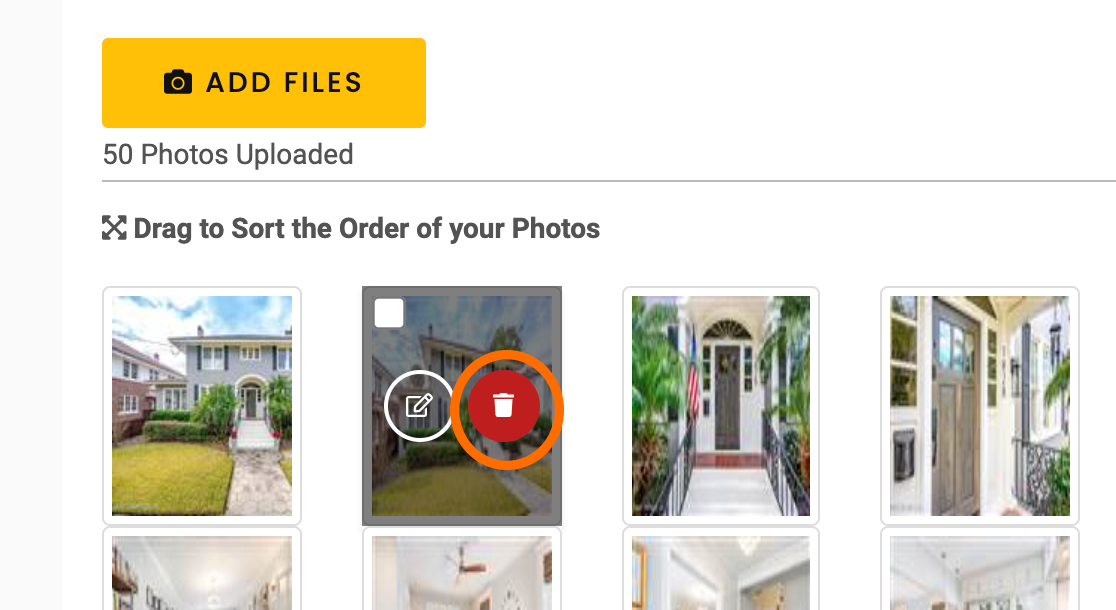
3. Delete a Photo
The Location Details page opens up, stroll down to UPLOAD IMAGES. This is where you will edit, remove, or add your photos.

Hover your mouse over the photo you’d like to delete, a set of icons will appear. Click on the Trash icon to delete the photo (the icon will turn red when hovered).
A pop-up screen will appear asking you to confirm that you’d indeed like to delete the photo. Click on the red “YES” button. If you change your mind, click on the “NO” button.

A green notification box will appear to confirm that your photo was deleted.

4. Delete Multiple Photos
If you’d like to delete multiple photos, simply check the box on the upper left of each photo you want to remove. When done, click on the red “DELETE PHOTO(S)” button on the right. (Note - You can delete a single photo this way also.)

A pop-up screen will appear asking you to confirm that you’d indeed like to delete the photos. Click on the red “YES” button. If you change your mind, click on the “NO” button.

A green notification box (similar to the above green box) will appear to confirm that your photos were deleted.
5. Save
When you’ve finished deleting photos, make sure to click the “SAVE LOCATION” button in the bottom right. Otherwise, the new edits will not be saved.
